The assignment from this week was first to design and 3D print a small object that could not be made subtractively, and second to 3D scan an object and optionally print it. One of the main reasons I was interested in taking this course is that for about a year now a colleague and I have been working on a prototype for a next-generation gene synthesis device, but we're both only amateurs when it comes to the much-needed skill of electronics design. We haven't covered that topic yet in the course, but for this week I wanted to design and print a 3D model of DNA to keep myself inspired. Additionally, most of the DNA models I was able to find by searching on CAD forums were not representative of the "B" form of DNA described by Watson & Crick: right-handed helices, 36 degree rotation/bp, ~10bp/turn, and major/minor grooves.
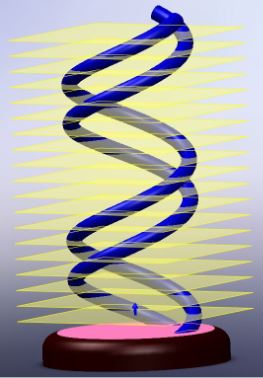
At first I didn't feel like I was quite ready to tackle this design in SolidWorks, but both the tutorials available on the SolidWorks website and the enormous amount of SolidWorks-related YouTube videos turned out to be great help. I wanted my design to include a base upon which the helices could vertically stand, so I made this first by extruding a circle and filleting the top edge. I used the helix tool to create two vertical helices, and then a linear pattern of reference planes that would contain the sketches of the nucleotide "bridges" connecting the helices:
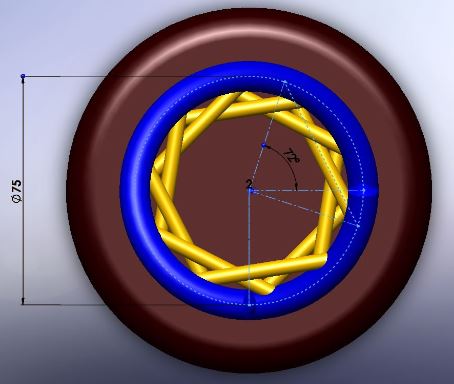
As you move up the reference planes to create the familiar DNA "ladder", you have to rotate the nucleotide bridge 36 degrees counterclockwise relative to the one directly beneath it while making sure you're creating the bridge on the same circle that defines the helices. I made use of the Convert Entities tool to copy this circle into each reference plane sketch, and then drew a chord representing the position of the bridge:
I repeated this for the remaining rungs of the ladder until complete, added color, and used the Scale tool under Molds to make sure my model only stood a few centimeters tall. I wanted to be able to keep this model for quite a while so it was suggested that I have it printed using ABS, which also would simplify the step that removes the supporting material. Here is the final version of the 3D model and the print, which I'm very happy with (thanks Enas and Jen!):

Happy with how printing turned out, I naively expected scanning to be straightforward. I'm sure there are techniques that make the Sense 3D scanner easier to use than I experienced, but I found using it to be frustrating. Every item that I wanted to scan (my computer mouse, a piece of petrified wood, an MIT mug) turned out like this or worse:
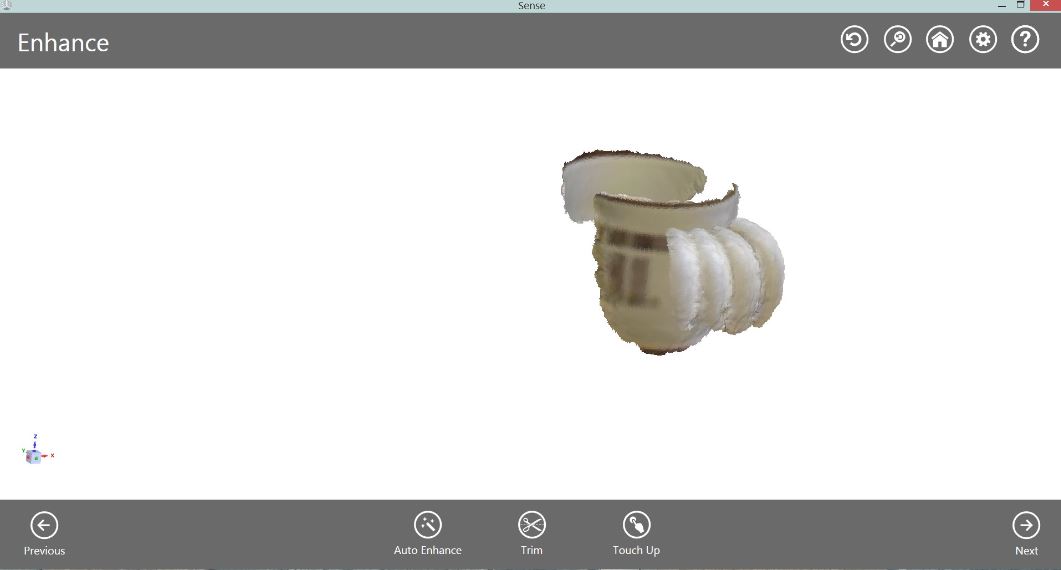
Sorry, Cubify Sense, but no amount of Auto Enhance and Touch Up is going to turn that into a mug (actually, it becomes a massive blob that is completely unidentifiable). I was, however, able to eventually get a decent scan on a random thing I found lying around the architecture lab:
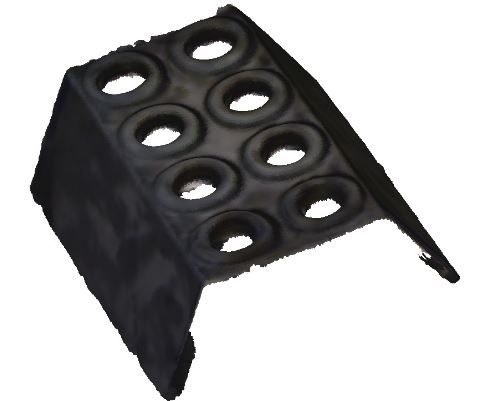
Not perfect, but not a 4-handled mug. Nevertheless, I have to admit that I'm more excited about the prospects of an affordable, hobbyist 3D scanner after having a chance to try out 3D printing. It would be amazing to have access to such a powerful design tool while still in the early stages of learning CAD software.
Lastly, especially after the scanning failures (half-successes?), I wanted to give the MakerBot Replicator 2 a try. It was an opportunity to be more actively involved in setting up the print, which made the whole process less of a black box. I also wanted to compare ABS and PLA prints. The native menus and prompts, and accompanying software, made the MakerBot really easy to use, but I can see how manually leveling the build plate before each print could become tedious and somewhat unreliable. I didn't feel like manually chipping away at all the support material that would be needed to print the DNA model, but I was also curious about vertical builds and angles that sit on the edge of *just* not needing supports. I searched in freely distributed CAD design forums for something fun and suitable, and eventually settled on...BABY GROOT! Not only was he a vertical design with ~45 degree overhangs, but he was BABY GROOT. Here is a mid-print shot of the MakerBot in action:

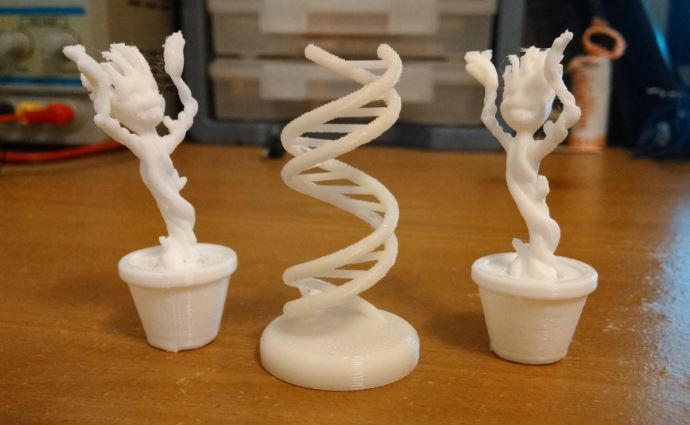
I used the default print settings of 0.2 mm resolution, 10% infill, and two shells. I also turned on raft for easy removal. In terms of material, I find little difference between PLA and ABS other than aesthetic considerations, where I find ABS to have a duller appearance. Here is one final shot of two printed Baby Groots celebrating a successfully printed DNA model, a good end to any week: